Thursday, September 8, 2016


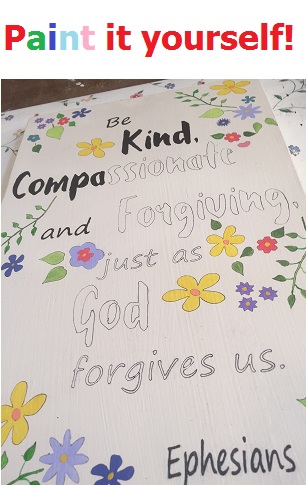
Wouldn't you LOVE to create your own beautiful hand-painted wood signs? 

 You can make these signs and many more yourself!!


WildflowerLoft is a very successful sign shop on Etsy.com, it has some of the most popular signs found on the market today.

I've had so much fun making signs and I've learned a lot. I'd like to share my hard work so that others can enjoy this creative process without all the trials and errors.

Love to create? Are you a maker? Love DIY projects?
So many of us love to create but our time is so limited. Now with supplies purchased from my Etsy.com shop you can make your own professional and impressive sign in very little time.

You can order the blank ready to paint boards here and they look like this:
One time use self-adhesive stencils are available from my shop also. If you don't see a stencil with the design you want, just ask me...I'm working hard to get them all listed. Almost all of my designs are available as stencils.

My stencils look like this:


When your stencil arrives, it will have 'transfer tape' on the front of it so it looks like this photo below.

Simple Steps:
1. Peel off the backing layer to reveal the adhesive stencil. (I usually draw a straight line on the front of my stencil to use as a guide)
2. Making sure my stencil is on straight, I place it onto the wood or other surface.
3. Remove the top layer (the transfer tape) 
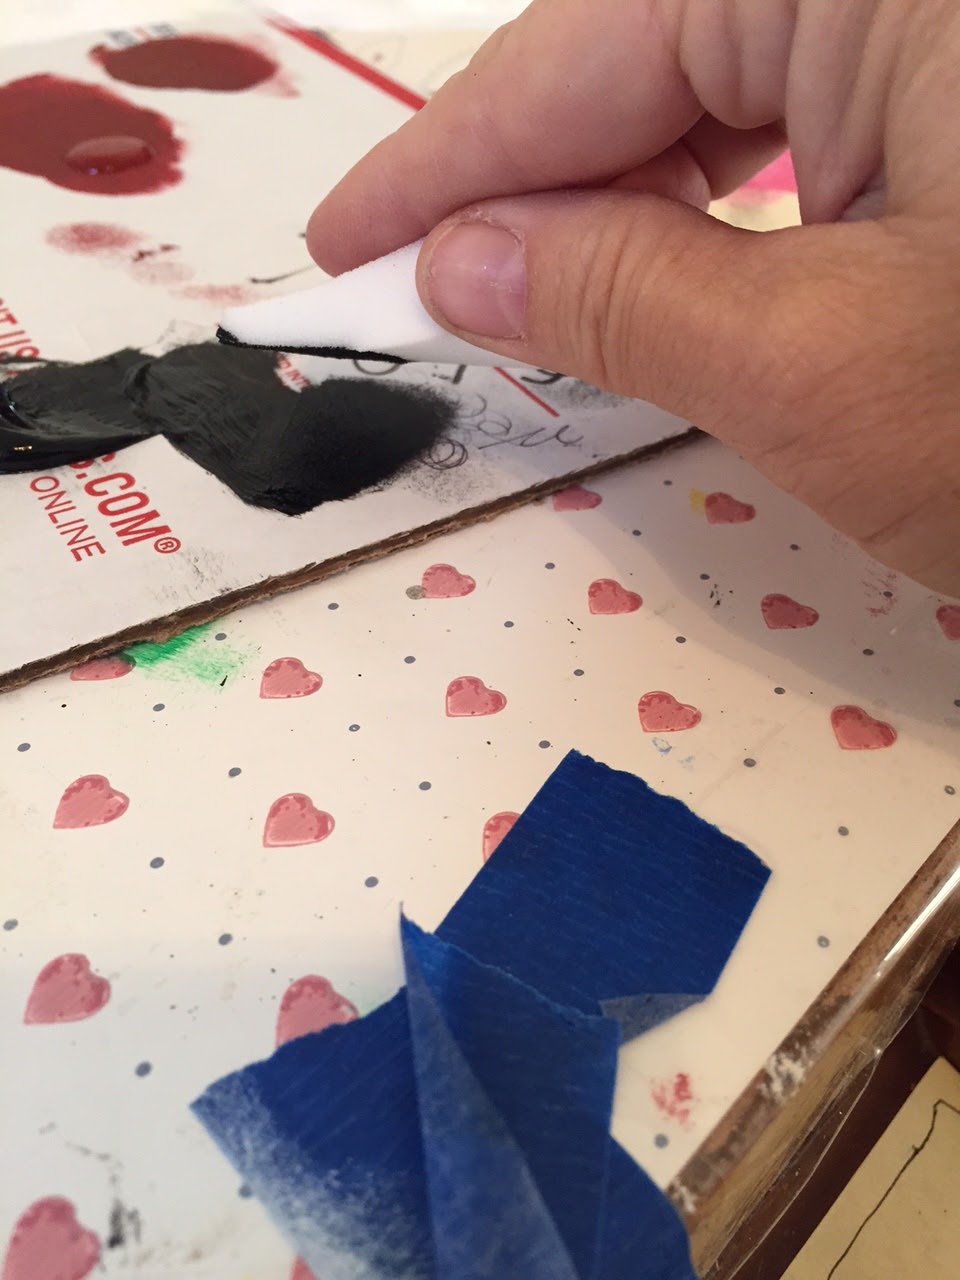
You are now ready to paint!
I like to stencil my signs using cosmetic wedge sponges. For the best results use very little paint, dab off the excess paint and apply it in light layers. 

Enjoy this DIY project and tell your friends. 

This would make a great ladies craft night project too!

Thanks and please stop by my shop :)
Sherrie
WildflowerLoft on Etsy  


Thursday, August 18, 2016

WildflowerLoft is so excited to present my latest creations- Ready to Paint Signs!


I've combined the popularity of making your own signs with the craze that is sweeping the country right now, Coloring pages for adults!

If you love to color or paint the super popular coloring books for adults but would like to display your beautiful creations, you are going to love these coloring/painting boards. They are so much fun to finish! I can't seem to make one and not paint it myself LOL. 


WildflowerLoft is my successful sign shop on Etsy.com - I also sell diy boards for those who like to make their own signs. This is a way to #makeYourOwnSign but with the design already there for a no-fail end product.

Order several of these and host your own group #paintNight or have a #CraftNight at your church or neighborhood event. 

My coloring/paint it yourself designs are printed on wood and come ready to hang with a wire hanger across the back. The boards can be colored with permanent markers or whatever type of paint you'd like. (I use acrylic) A clear finishing coat can be sprayed on to seal your finished design to protect it.  

Faith sign ready to paint and then a sample that I painted. Choose your own colors to match your decor.


 Be Kind, Compassionate and forgiving just as God forgives us. Bible verse Ephesians 4:32


 Sign comes on painted pine board that is ready to paint.
In process of adding acrylic paint.

 This is a sample of how this sign can be painted. It can be finished at this point or it can be outlined with a permanent black marker to add some extra interest as shown in the photo below.

 Check back often because I am having so much fun creating more designs.
 Let me know if you don't see the quote you are looking for by using the contact button on my Etsy shop - WildflowerLoft 

Thanks for stopping by my blog and my shop!
Sherrie
  

WildflowerLoft is so excited to present my latest creations- Ready to Paint Signs!


I've combined the popularity of making your own signs with the craze that is sweeping the country right now of adult coloring pages.

If you love to color or paint the super popular coloring books for adults but would like to display your beautiful creations, you are going to love these coloring/painting boards. They are so much fun to finish! I can't seem to make one and not paint it myself LOL. 


WildflowerLoft is my successful sign shop on Etsy.com - I also sell diy boards for those who like to make their own signs. This is a way to #makeYourOwnSign but with the design already there for a no-fail end product.

Order several of these and host your own group #paintNight or have a #CraftNight at your church or neighborhood event. 

My coloring/paint it yourself designs are printed on wood and come ready to hang with a wire hanger across the back. The boards can be colored with permanent markers or whatever type of paint you'd like. (I use acrylic) A clear finishing coat can be sprayed on to seal your finished design to protect it.  

Faith sign ready to paint and then a sample that I painted. Choose your own colors to match your decor.


 Be Kind, Compassionate and forgiving just as God forgives us. Bible verse Ephesians 4:32


 Sign comes on painted pine board that is ready to paint.
In process of adding acrylic paint.

 This is a sample of how this sign can be painted. It can be finished at this point or it can be outlined with a permanent black marker to add some extra interest as shown in the photo below.

 Check back often because I am having so much fun creating more designs.
 Let me know if you don't see the quote you are looking for by using the contact button on my Etsy shop - WildflowerLoft 

Sunday, January 31, 2016

CUSTOMER PHOTOS

My job is so rewarding when customers are happy. 

I absolutely LOVE it when I receive a photo of the signs hanging in their final destination.

Send your photo and receive a 20% off coupon!!!

Since this is a new feature I've started, please send your photo to me to be included.
To send your photo go to www.etsy.com/shop/wildflowerLoft   Click the button "Contact Shop Owner" and you can attach your picture there.


 "This gift was her favorite this year. Quick turnaround and nice quality" 


"It is beautiful! Great quality." 
 
 
Perfect custom job! I love it! 

"Literally better than I expected and comes with a convenient hanger already!! It's going to be a great addition to my wedding!!!! Thank you for the beautiful item!!"


Perfect for our daughter's nursery.

"We LOVE this piece. It hangs above our kitchen table and is a wonderful reminder of a mantra we have had in our family for some time now. It is well made, but looks rustic, weathered and loved. It's perfect!"


"We ordered this for our daughter's nursery and absolutely love it! You can tell how nicely hand-made it is."

"Too cute! Now I want one for every room! 😀"


"Thank you for my custom sign! It's gorgeous & I can't wait to get it on the wall!!"

"
This sign turned out perfectly! Thank you for changing the colors for me. My mother is thrilled. She said it was beautifully packaged and she loves her new decor. Thank you so much!"


Saturday, December 5, 2015

The best way to stencil

by
Sherrie Carter
WildflowerLoft on Etsy


Supply List
Cosmetic wedge sponges - Walmart
Thick paint - Hobby Lobby
Fine tip paint brush
Blue painters tape

Scrap of cardboard

Start with a board or other project piece that you want to stencil on.

Using painters tape, secure the stencil down tight. You do not want paint to ooze under the stencil. 


I use a quilters ruler to make sure my stencil is lined up straight.

I buy the thickest paint I can find. This is one of the products I use. I buy the paint in the 'fine artist' section of Hobby Lobby - where the canvas is sold.


I use cosmetic wedge sponges and not much paint! I squirt out a small amount of paint onto a cardboard or some throw-away scrap. Cardboard works well.


I dip the sponge into the paint and then wipe off excess onto the cardboard. I'm not ready to start stenciling until the paint on the sponge is sticking to the cardboard when you blot it. This is my clue that the paint is dry enough.


Using the sponge, 'pounce' lightly over the entire stencil reapplying the paint onto the sponge as described above.

MOST IMPORTANT: Its WAY better to not try to cover the stencil design completely the first time. I'd MUCH rather go over it 3 or 4 times lightly than see the paint that oozes under the stencil from using to much paint or pouncing to hard. Having to paint around the edges of each letter to clean up the oozed letters is very hard and time consuming and just never looks as clean as stenciling with less paint. :)


(Here is an example of the fuzzy oozed paint that you don't want!)
It also helps to press the stencil down with your fingertips on the surface surrounding the area you are painting...moving along pressing it down as you go across the entire stencil.

 1st coat of paint
2nd coat of paint


Lift the stencil on one side to check the quality...remove it if you are satisfied.


When you remove the stencil, letters like p and o have the middles attached with little bridges that need to be connected using a fine tip paint brush. Not closing the bridges (in my opinion) doesn't look finished or professional. 

 The next step is closing in the stencil 'bridges' or gaps using a fine tip paint brush.
 

 Once the bridges are painted closed, take a final look at your project using a critical eye. Look for seeps and smudges and uneven paint and touch those areas up.


TIP: Practice on a scrap piece first so you don't ruin your final project piece. 


Enjoy your finished product!

Hope these instructions help, Enjoy creating :)
Sherrie
WildflowerLoft on Etsy.com 


Buy my finished signs at www.etsy.com/shop/WildflowerLoft

Buy boards ready to paint here 

Wednesday, May 13, 2015