


by
Sherrie Carter
WildflowerLoft on Etsy
Supply List
Cosmetic wedge sponges - Walmart
Thick paint - Hobby Lobby
Fine tip paint brush
Blue painters tape
Scrap of cardboard
Start with a board or other project piece that you want to stencil on.
Using painters tape, secure the stencil down tight. You do not want paint to ooze under the stencil.

I use a quilters ruler to make sure my stencil is lined up straight.
I buy the thickest paint I can find. This is one of the products I use. I buy the paint in the 'fine artist' section of Hobby Lobby - where the canvas is sold.

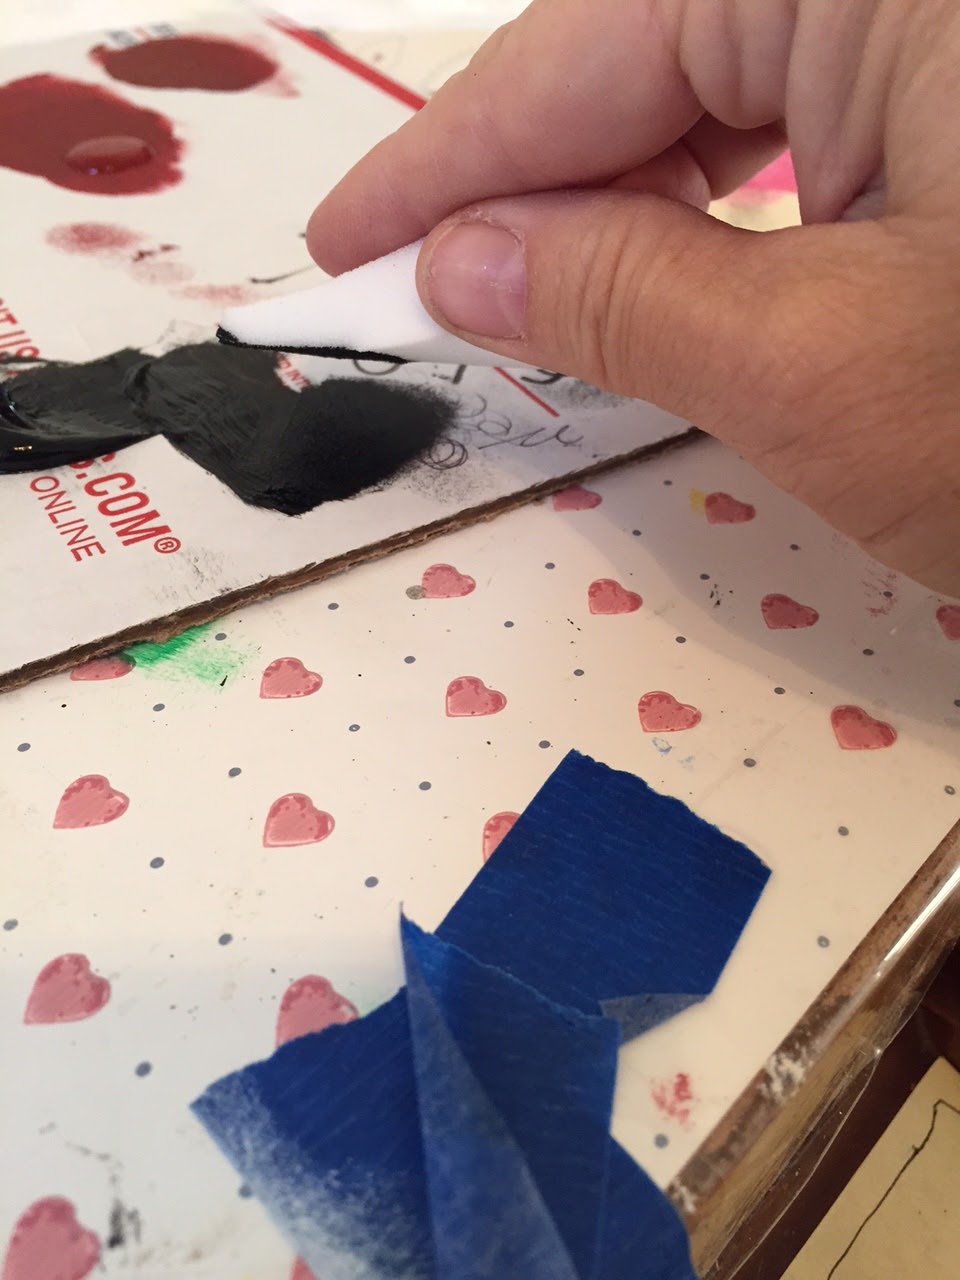
I use cosmetic wedge sponges and not much paint! I squirt out a small amount of paint onto a cardboard or some throw-away scrap. Cardboard works well.

I dip the sponge into the paint and then wipe off excess onto the cardboard. I'm not ready to start stenciling until the paint on the sponge is sticking to the cardboard when you blot it. This is my clue that the paint is dry enough.


Using the sponge, 'pounce' lightly over the entire stencil reapplying the paint onto the sponge as described above.
MOST IMPORTANT: Its WAY better to not try to cover the stencil design completely the first time. I'd MUCH rather go over it 3 or 4 times lightly than see the paint that oozes under the stencil from using to much paint or pouncing to hard. Having to paint around the edges of each letter to clean up the oozed letters is very hard and time consuming and just never looks as clean as stenciling with less paint. :)
(Here is an example of the fuzzy oozed paint that you don't want!)

It
also helps to press the stencil down with your fingertips on the
surface surrounding the area you are painting...moving along pressing it
down as you go across the entire stencil.

1st coat of paint

2nd coat of paint
Lift the stencil on one side to check the quality...remove it if you are satisfied.

When you remove the stencil, letters like p and o have the middles attached with little bridges that need to be connected using a fine tip paint brush. Not closing the bridges (in my opinion) doesn't look finished or professional.
The next step is closing in the stencil 'bridges' or gaps using a fine tip paint brush.

Once the bridges are painted closed, take a final look at your project using a critical eye. Look for seeps and smudges and uneven paint and touch those areas up.

TIP: Practice on a scrap piece first so you don't ruin your final project piece.

Hope these instructions help, Enjoy creating :)
Sherrie
WildflowerLoft on Etsy.com
Buy my finished signs at www.etsy.com/shop/WildflowerLoft
Buy boards ready to paint here
No comments:
Post a Comment